Jennifer Sheahan: Here's the lowdown on floor plans

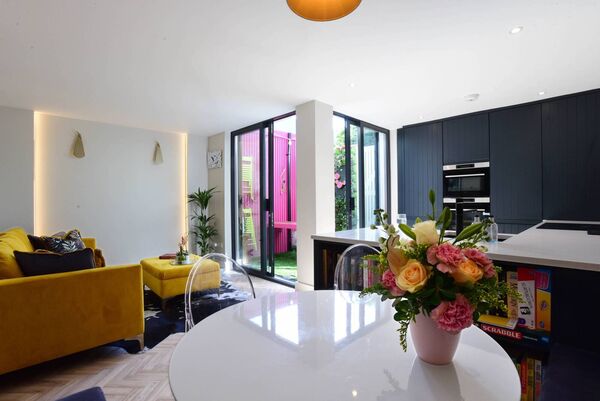
Jennifer Sheahan used a floor plan to find the right-sized dining table for her space. Picture: Moya Nolan

Creating a floor plan is something that your interior designer or your architect will do when designing your home. You do not need to learn how to create a professional floor plan, but it is useful to learn how to play around with them to get the best layout for your home.
Experimenting with floor plans allows you to try out lots of different layouts, furniture arrangements, and even lighting options without actually dragging around furniture or building walls or doing anything more labour-intensive than lifting a pen.
When I was renovating my own home, I played around with multiple layouts to try different ideas and to fit everything that I wanted in the way that I wanted it. Some of this involved a lot of back-and-forth with my ever-patient interior designer (Caroline Maguire) and kitchen designer (Dawn in Savvy Kitchens) but a lot of it I just did myself using really simple tools — namely a pen and paper, and PowerPoint.
Going back-and-forth with your interior designer or architect a million times to tweak your floor plan is not ideal, or indeed you may not have an interior designer or an architect on hand.
In either case, read on for some simple ways to use floor plans to experiment with your room layouts.
There are two types of floor plans: 2D and 3D. 3D floor plans are too advanced for today — and indeed for anyone who is not actively working in the construction industry — so we will be focusing on how to create a 2D floor plan. You get to choose whether you go digital or stick with old faithful — pen and paper.

If you’re sticking with pen and paper it is best to find graph paper and ignore what I said earlier — use a pencil, not a pen. With an eraser. If you’re going digital, there are lots of free tools to use but the simplest and the one I use most is PowerPoint. If you don’t have a PowerPoint licence, you can use the free Google version which is called Google Slides. (Feel free of course to use any other drawing program you’re already familiar with.) You will also need a measuring tape.
If you have existing floor plans from your interior designer, builder, or architect, then you can skip this step. If not, you need to measure, measure again, and then measure a third time.
I cannot stress how important this step is. What you need to measure is the length and width of each room, the width of doors, windows, and any other architectural features, and if possible the height of your ceilings.
If you — like me — hate those fiddly tape measures that ostensibly roll back neatly into themselves but actually slap back on your hand like a snap bracelet with a vendetta, then you can buy a laser measure in a hardware shop or online for around €50-60.
Once you have your measurements, it’s time to start drawing. You’re either using a pencil and paper or PowerPoint, so just get started and you can fix mistakes later. Start with one room, and draw the perimeter outline of that room — that is, the length and width of the walls. It should simply look like a rectangle when you are finished.

An important concept to get right here is scale. If you’re using graph paper, use the boxes to measure scale — for example, if your room is five metres long, then use five of the large boxes on the graph paper to represent this.
If you’re using PowerPoint (or Slides), use the option to “view gridlines” (usually under the “View” menu).
Next, it’s time to draw in where your doors windows and other architectural elements. Again, make sure you have the measurements right. I usually just draw a thicker line to mark where the windows are.

For doors, make sure you add in which way they open. Do this by adding a curved line along where the door opens out — it should end up looking like a quarter of a circle. Other architectural elements include permanent items such as steps, or existing items that cannot be moved, for example, a beam or a boiler. You don’t have to draw these items perfectly — just draw the basic shape and add labels to show what they are.
Once you have included all of the permanent elements you can get ready to add in items such as furniture, kitchen cabinets, or built-in units. If you’re using a digital tool like PowerPoint, what I like to do is create simple shapes to represent these items. For example, I simply add in a rectangle for a couch — you don’t need to draw the nuanced shape of the arms or the curve of the cushions.
If you are using a pencil and graph paper, there are two options. The first is to draw over the permanent items (walls and windows) with a pen.
Make sure your measurements are right before you do this! This will then allow you to draw movable items like furniture with a pencil so that you can erase them easily and draw them somewhere else.
The other option, which is a bit more effort upfront, is to cut out basic shapes from another piece of paper and label them, you can move them around on your floor plan as you please.
There are some principles you should follow first, before you go and put your furniture wherever the hell you want it. The three most important ones for now are flow, spacing, and standard sizing.

Flow means having clear pathways through your space so that you don’t bang into the island every time you walk into your kitchen.
Spacing means making sure you have enough room to move around objects, for which there are general guidelines available — simply search, for example, “minimum space between kitchen counter and island” and you will find it is 800mm at the very least.
Finally, standard sizing is for items such as beds, seat depth, and kitchen units — all of which tend to come in standard sizes that cannot easily be altered.
You are now (finally, says you) ready to start playing around with layouts and arrangements — and, my favourite one, lighting. If you know which way your house is oriented (you can check on existing plans, Google Maps, or using a compass) then you can see on your floor plan where natural light can be maximised, and where to place electric lighting.
If you have existing furniture, you can use your floor plan to move this around and see where it fits best. If you don’t, you can use your floor plan to measure what space you have available so that you make the right purchases. A little effort upfront will save you plenty of money and headaches later!